0.2 How to Use This Book
Tip
For the best reading experience, it is recommended that you read through this section.
0.2.1 Writing Style Conventions
- Sections marked with
*after the title are optional and somewhat more challenging. If you're short on time, you can skip them on your first pass. - Technical terms are shown in bold (in the print and PDF editions) or underlined (in the web edition), such as array. They are worth remembering, as they will help when reading technical literature.
- Key content and summary statements will be bolded, and such text deserves special attention.
- Words and phrases with specific meanings will be marked with "quotation marks" to avoid ambiguity.
- When terminology differs across programming languages, this book follows Python conventions; for example, it uses
Noneto represent "null". - This book partially relaxes conventional programming-language comment styles in favor of a more compact layout. Comments are mainly divided into three types: title comments, content comments, and multi-line comments.
0.2.2 Learning Efficiently with Animated Illustrations
Compared with plain text, videos and images have higher information density and a clearer structure, making them easier to understand. In this book, key concepts and challenging topics are presented mainly through animated illustrations, with text serving as explanation and supplement.
If, while reading this book, you encounter an animated illustration like the one shown below, treat the illustration as primary and the text as supplementary, and use both together to understand the content.
Figure 0-2 Example of animated illustrations
0.2.3 Deepening Understanding Through Code Practice
The accompanying code for this book is hosted in the GitHub repository. As shown in Figure 0-3, the source code comes with test cases and can be run with one click.
If time permits, it is recommended that you type out the code yourself. If you have limited study time, please at least read through and run all the code.
Compared with simply reading code, writing it yourself often brings greater rewards. Hands-on practice is where real learning happens.
Figure 0-3 Example of running code
Getting the code running mainly involves three preliminary steps.
Step 1: Install the local programming environment. Please follow the tutorial in the appendix. If it is already installed, you can skip this step.
Step 2: Clone or download the code repository. Visit the GitHub repository. If you have already installed Git, you can clone this repository with the following command:
Alternatively, you can click the "Download ZIP" button shown below to download a ZIP archive of the repository directly and then extract it locally.
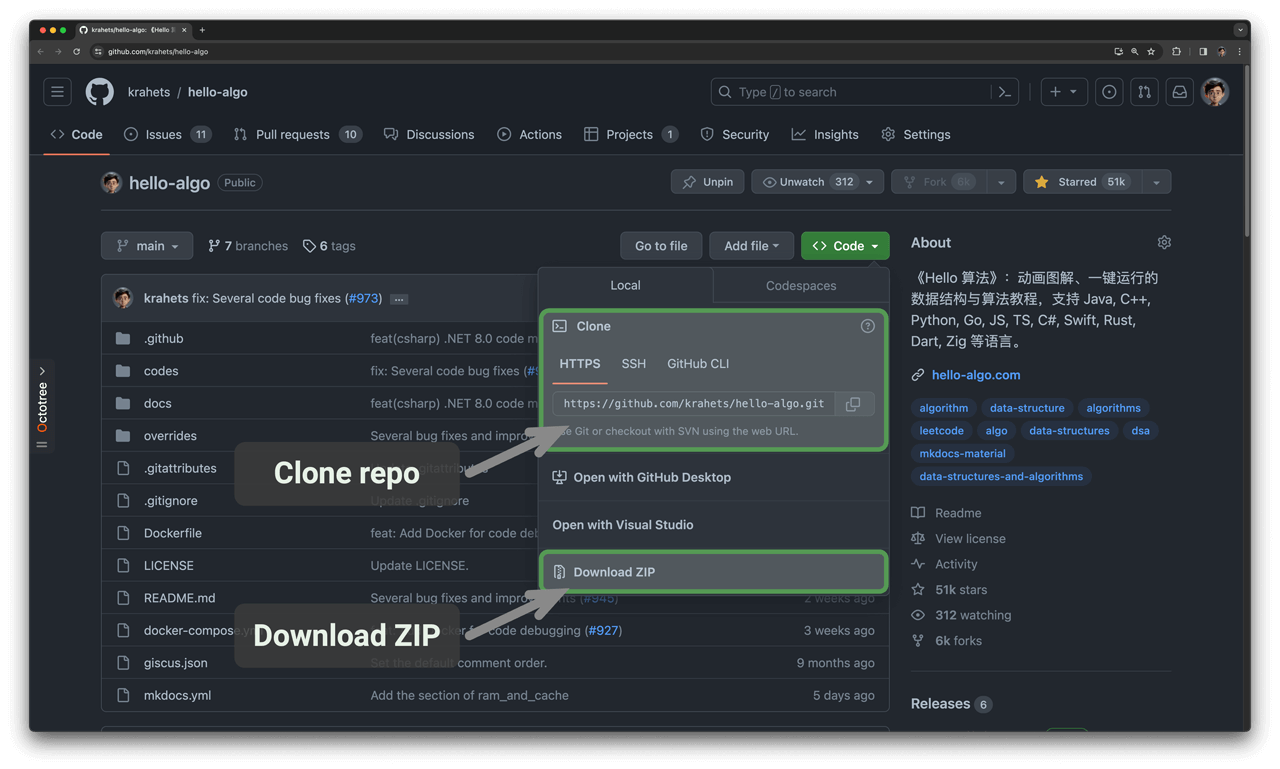
Figure 0-4 Clone repository and download code
Step 3: Run the source code. As shown in Figure 0-5, for code blocks with file names at the top, we can find the corresponding source code files in the codes folder of the repository. The source code files can be run with one click, which will help you save unnecessary debugging time and allow you to focus on learning content.
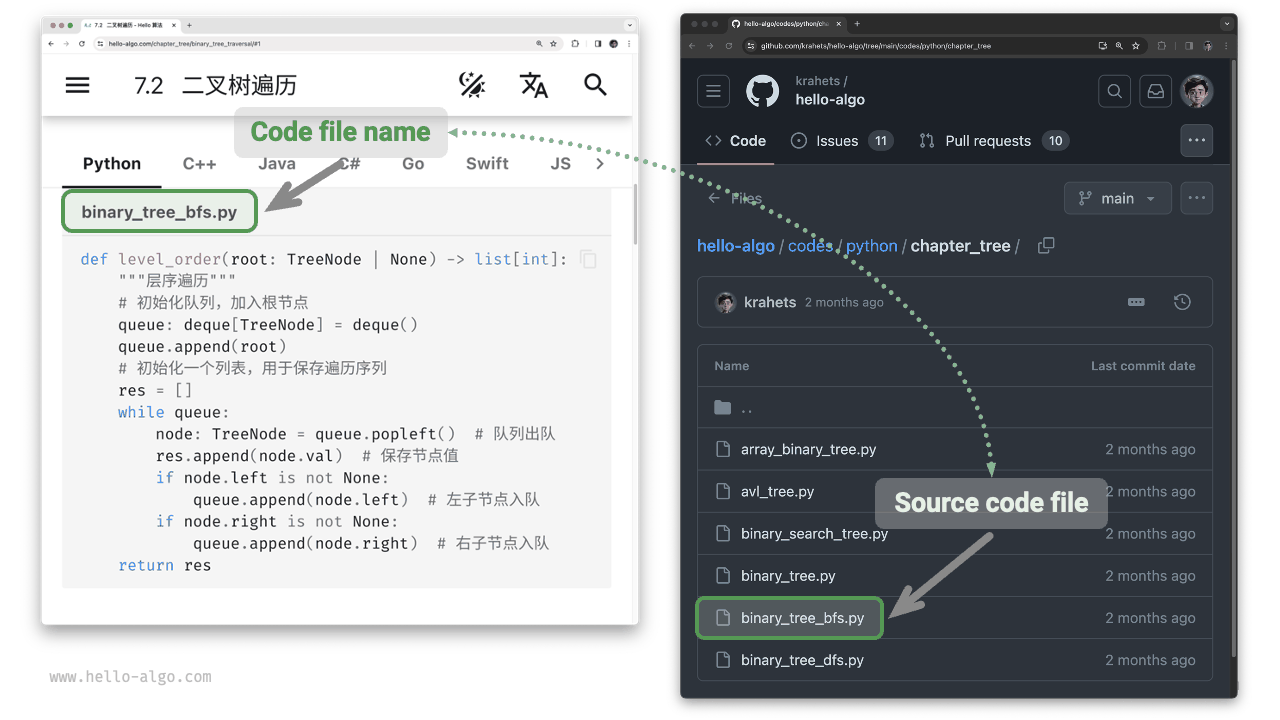
Figure 0-5 Code blocks and corresponding source code files
In addition to running code locally, the web version also supports visual execution of Python code (implemented based on pythontutor). As shown in Figure 0-6, you can click "Visual Run" below the code block to expand the view and observe the execution process of the algorithm code; you can also click "Full Screen View" for a better viewing experience.
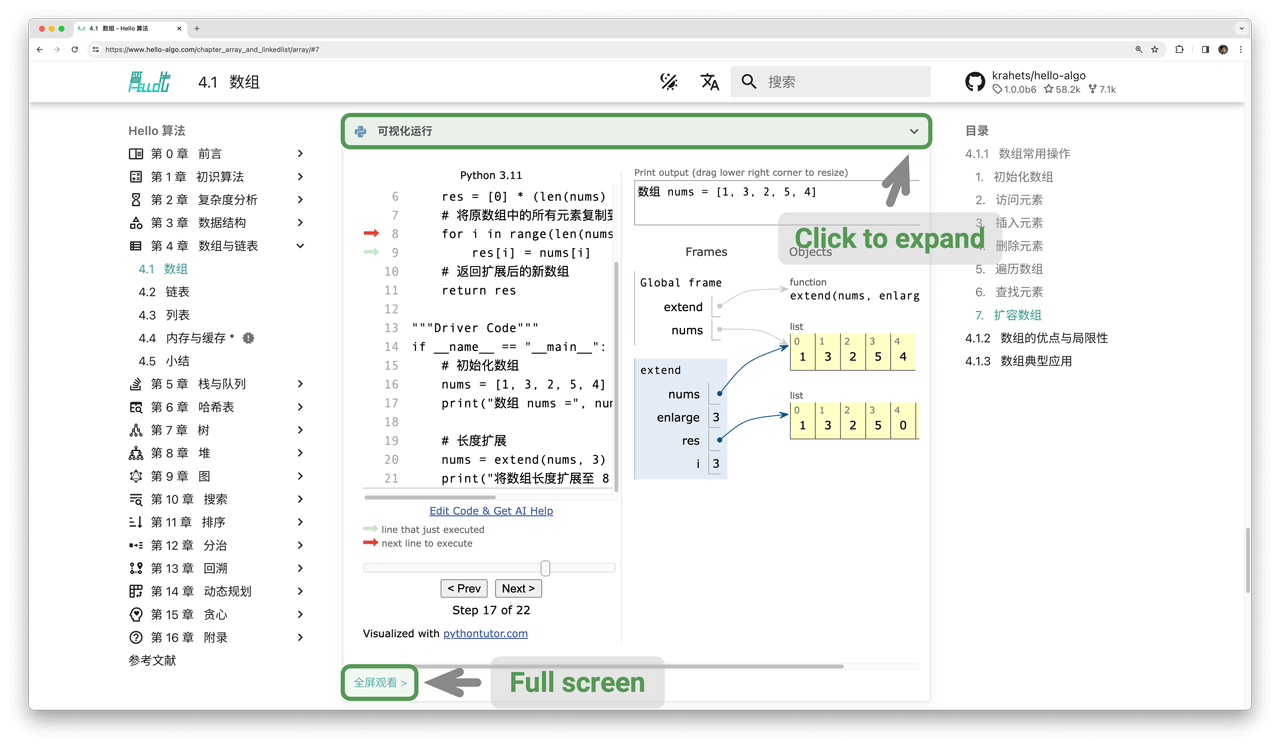
Figure 0-6 Visual running of Python code
0.2.4 Growing Together Through Questions and Discussions
When reading this book, please do not skip over points that you still do not fully understand. Feel free to ask your questions in the comments section, and my friends and I will do our best to answer them, usually within two days.
As shown in Figure 0-7, the web version has a comments section at the bottom of each chapter. I encourage you to pay close attention to the discussions there. On the one hand, you can learn about the problems that others encounter, thereby filling gaps in your own understanding and prompting deeper thought. On the other hand, I hope you will generously answer other readers' questions, share your insights, and help others improve.
Figure 0-7 Example of comments section
0.2.5 Algorithm Learning Roadmap
Overall, we can divide the process of learning data structures and algorithms into three stages.
- Stage 1: Algorithm introduction. We need to familiarize ourselves with the characteristics and usage of various data structures, and learn the principles, processes, uses, and efficiency of different algorithms.
- Stage 2: Practice algorithm problems. It is recommended to start with popular problems and solve at least 100 of them first, so that you become familiar with mainstream algorithm questions. When you first begin practicing problems, "knowledge forgetting" may feel like a challenge, but rest assured, this is very normal. We can review problems according to the "Ebbinghaus forgetting curve", and after 3-5 rounds of repetition, they usually stick firmly in memory. For recommended problem lists and practice plans, please see this GitHub repository.
- Stage 3: Building a knowledge system. In terms of learning, we can read algorithm column articles, problem-solving frameworks, and algorithm textbooks to continuously enrich our knowledge system. In terms of practicing problems, we can try advanced problem-solving strategies, such as categorization by topic, one problem multiple solutions, one solution multiple problems, etc. Related problem-solving insights can be found in various communities.
As shown in Figure 0-8, the content of this book mainly covers "Stage 1", aiming to help you more efficiently carry out Stage 2 and Stage 3 learning.
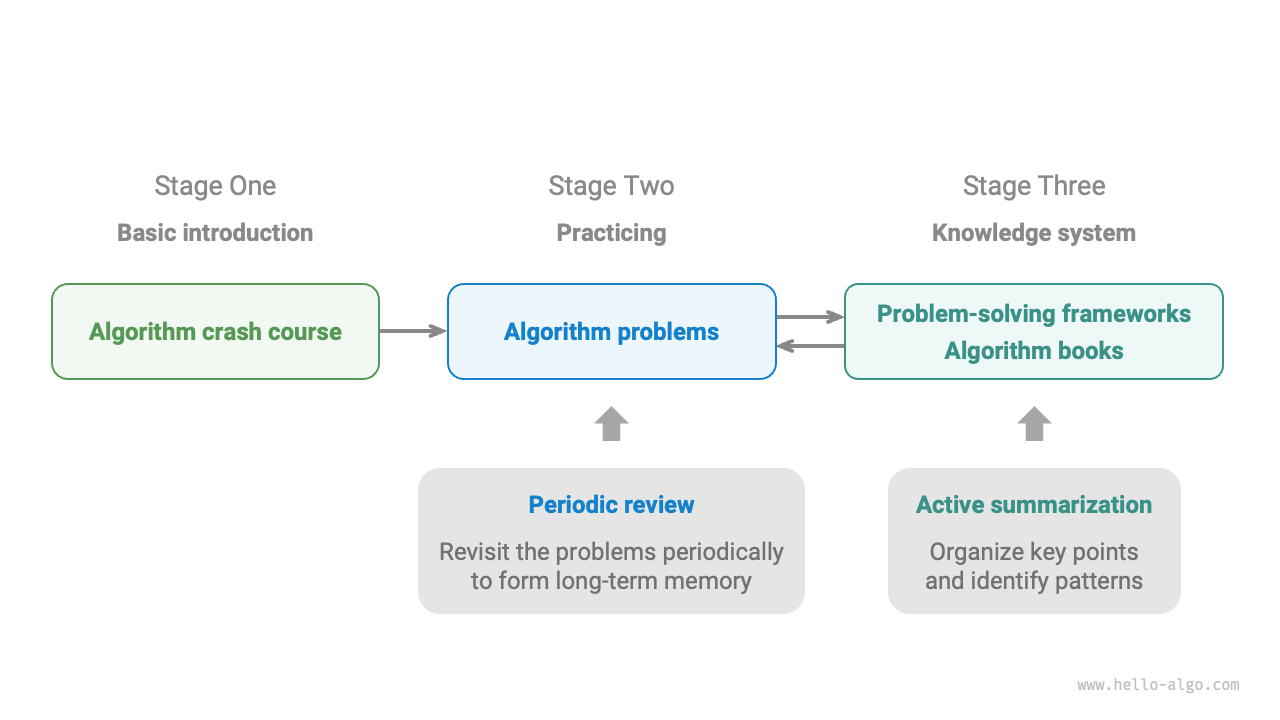
Figure 0-8 Algorithm learning roadmap